An Intro to Automated Testing with Cypress


As a QE automation engineer, my responsibilities typically include building both UI and API automated tests. Over the years I have worked with a number of languages, tools, and frameworks to get that job done.
For UI tests, I usually work with frameworks that automate the browser via Selenium, with languages such as Java, JavaScript, Ruby, and c#.
For API, I have usually focused on Postman with JavaScript, and REST-Assured or Karate with Java.
Being able to work with all these frameworks and languages requires plenty time and experience, and even on a single project the QE resources will need a number of skills to deal with both UI and API testing.
OK, so what does that have to do with Cypress?
What is Cypress
Cypress is an open sourced JavaScript-based test automation framework that is typically used for testing web applications that leverage modern JavaScript frameworks.
A couple of key points:
-
Cypress allows you build both UI and API tests, which can allow QE engineers to focus more on building awesome tests, and less on learning a laundry list of tools.
-
Cypress does not use Selenium. When you install Cypress, you are installing everything you need to get started.
I've heard a lot about Cypress lately. I don't have any real world experience with it, so this series of posts will document my learning journey, and hopefully help others.
So let's get started!
Installing
Create a folder for your test project and run npm init from the project folder:
npm init -y
Now install Cypress:
npm install cypress --save-dev
Now we can now start the Cypress Test Runner:
./node_modules/.bin/cypress open
As Cypress starts up you should see something like this:

Once the Test Runner is started, you'll see this:
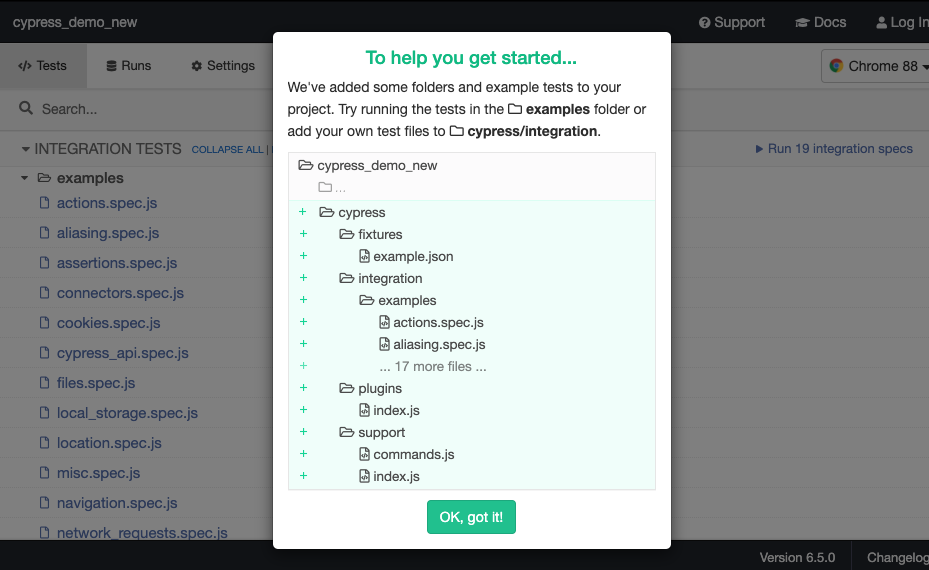
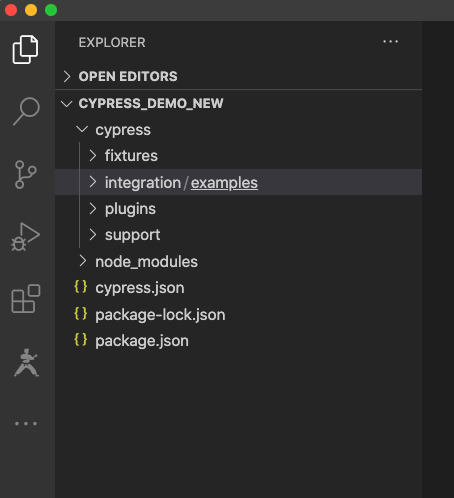
Yes, when you first start the test runner it will automatically add some sample tests to your project. This is what I see when I open the project in VS Code:
So let's take a look at these sample tests!
An overview of a test
Using your favorite IDE or test editor, take a look at the file location.spec.js found in the integration/examples folder.

Hopefully location/spec.js looks familiar. A few key points:
- All of these sample tests are accessing the Cypress sample app https://example.cypress.io/. The sample tests provide a thorough overview of Cypress features, and the site being tested includes Cypress doco, so you get twice the learning with a single test!
- If you've worked with mocha and chai, the test spec should look familiar. Cypress has leveraged familiar automation syntax to provide some level of familiarity to folks that have worked with those tools.
- This particular test spec has 3 tests, identified with the
it()keyword. - Prior to each test, we navigate to
https://example.cypress.io/commands/location, as described with the beforeEach() keyword.
So in short, the 3 tests will navigate to https://example.cypress.io/commands/location, then verify (1) the URL hash, (2) the URL location, and (3) the current URL.
Let's run the tests!
Running a test with the Cypress Test Runner
Go back to the Cypress Test Runner that we started previously. To run this test spec just expand the examples folder, find location.spec.js, and click it. That will start the test.
A new browser window should open that looks like this:
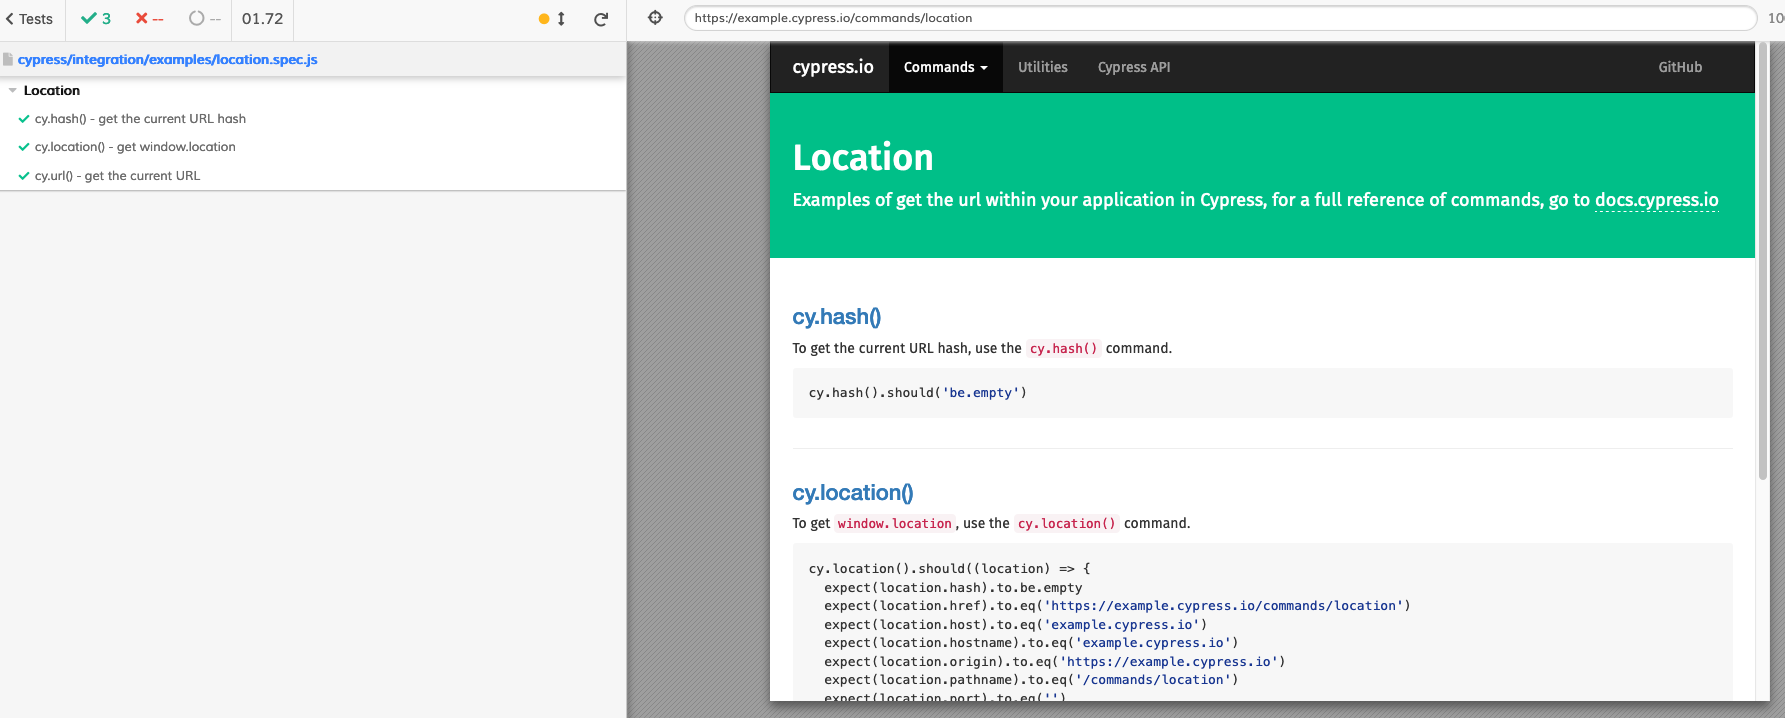
A few things to note:
- The panel to the left will show the tests that were run.
- The panel to the right shows the application under test.
- Along the top left you'll see that 3 test ran in a total of 1.72 seconds:

- You can expand the tests in the left panel to get more detail:

One of the cool things here is the application under test and the test runner are integrated into a single view when a test is run.
So how does the Test Runner know about our tests? It turns on that Test Runner is constantly monitoring our project and will immediately update the spec list when things change. To see that, go ahead and add an empty test spec file to the examples folder. You'll see that file immediately appear in the Test Runner.
Running a test from the command line
Ultimately we want these tests to run in a CI pipeline, which means we need to be able to run them headless from the command line. That usually take me a little time to get everything working properly, but with Cypress it's pretty easy. Try this:
./node_modules/.bin/cypress run --spec cypress/integration/examples/location.spec.js
You should see something like this, with 3 successful tests run from the command line.

Oh, and no visible browser was started. The tests all ran headless.
What's Next?
In this post we have just scratched the surface. To recap, we installed Cypress, checked out the syntax of a test, executed a test in the Test Runner, and executed the test from the command line.
There is a lot more I want to cover in future posts, including API testing with Cypress, integrating Cypress into a CI pipeline, and reporting.
If there are any questions, or ideas for future posts, please let me know in the comments.
Until then, stay tuned!